
My family uses their laptops a lot, and they tend to get them replaced after several years. A year ago, I scrounged around our house and rounded up every old computer that I could find with the hope of putting them together to make some kind of super computer.
Five old MacBook Pros in hand (some very old), I did some research and discovered that indeed I could put them to use in what is called a “Beowulf cluster“. A Beowulf cluster is a collection of computers connected through a (hopefully fast) network connection so that they can coordinate parallel and distributed computing tasks. In the next few blog posts, I’ll go into detail about how I turned a these discarded laptops that would have never been used again into a cluster that I use for distributed computing.
Hardware
The computers that I managed to get my hands on didn’t have very impressive specs, but hopefully the fact that they will be working together on distributed tasks will make up for that! Nevertheless, here is the hardware that I had to work with:
- 15″ MacBook Pro 2007 2.2 GHz 4G RAM single core
- 13″ MacBook Pro 2009 2.3 GHz 2G RAM dual core
- 13″ MacBook Pro 2009 2.3 GHz 2G RAM dual core (broken screen)
- Raspberry Pi 3
- Raspberry Pi 2
- WD MyCloud 2TB (more on this later)
I actually had two other laptops that were over 12 years old, an iBook G4 from ~2005 and a PowerBook from about 2006. Unfortunately, I didn’t end up using them because they wouldn’t even recognize and boot an Arch Linux USB boot drive.
Why Arch Linux?
Researching quickly lead me to realize that the first thing to do was install a distribution of Linux on each computer. With so many Linux distributions to choose from, I went with Arch Linux for the following reasons. First, several of these computers were over 5 years old, and running a bare-bones Linux distribution without the overhead of the full OSX or desktop environment would increase performance. Second, none of these laptops had identical hardware nor identical OSX versions. To avoid problems with in-homogeneous software compatibility, and the hassle of updating all computers to the same OSX, installing the latest version of some Linux distribution seemed the easiest solution. Third, I also had two Raspberry Pis laying around, and I wanted to include those in the cluster as well. I needed an operating system that could be installed on both an Apple computer and a Raspberry Pi. Fourth, building servers in Linux is much more common than with Mac OSX and for that reason the online resources for Linux server configuration are much more in depth. Fifth, although other distributions have great online support, I find the documentation for Arch absolutely stellar. Having installed Arch before, I foresaw a plethora of troubleshooting, and I knew having great online resources was paramount.
Finally, (most importantly) I wanted this project to be as a great a learning experience as possible! Prior to this project I felt much more comfortable in OSX than in Linux. I was confident that setting up the system using just the Linux CLI would maximize my learning. For these reasons, Arch Linux was my operating system of choice.
Installing Arch Linux
Installing Arch on each computer was probably the most time consuming and troublesome part of the project. There are a thousand installation guides online, not to mention the official one, so I won’t go into details, but I will mention some of the peculiarities and problems that I ran into (of which there were many). Luckily, the Arch Linux documentation has some excellent resources for installation troubleshooting, in addition to an army of community members, one of which has almost certainly already run into and solved whatever problems you have with Arch.
Installation Troubles
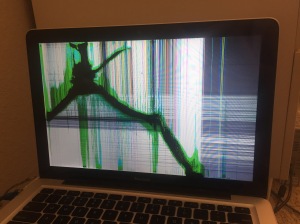
These computers were never going to be used for anything else again, so I did a full hard drive reformatting and partitioning (as opposed to a dual-boot). For the most part, installation went smoothly, but there were a few hiccups that left me staring at grub-rescue menus and hung boot processes– but nothing that digging deep through that Arch Linux forums couldn’t fix. One interesting problem that I had was that one of the 13″ MBPs had a completely broken screen (below).
This complicated the installation of Arch slightly. In an attempt to avoid doing the entire installation procedure blindly, I instead started an SSH service as soon the computer booted from the USB, and proceeded with installation remotely. To help with this, I wrote a bash script to run fresh on the USB boot media, that installs and starts an SHH daemon. This way, the only commands needed to be run blindly were the coping and running of the start-SSH script. I ended up running this script on all of the other nodes as well so that I could do as much of the system configuration remotely as possible.
Installing Arch on the Raspberry Pis were very easy since (luckily!) the Arch community has an image that can simply be flashed onto a micro SD card like you would with Raspbian.
Assembling the cluster
Putting the computers together was theoretically quite simple: just give each computer power and connect them to the same local network. Providing power was a bit tricky, given that all of the MacBooks used the old style charger, of which I had only a single functioning cable. I did have two frayed chargers, which luckily, I was able to solder together using a YouTube tutorial and it worked out perfectly.

Luckily, providing ethernet was much simpler given that each computer had a functioning ethernet port. I bought some ethernet cables, and plugged them into an 8-port ethernet switch and then connected that to my router. After that I simply set up the SSH daemon on each with a user to log in, told each computer not to sleep when the clamshell was closed and put them in the stack you see in the banner image.
Power Management
One of the first things that I noticed about the cluster was that the fans were running all of the time and the computers were getting very hot. It seems that the default power management that comes with Arch isn’t very well suited for Apple hardware, but after digging through some Arch forums, I found a solution. I installed the following packages and power management daemons
sudo systemctl enable powertop.service
sudo systemctl start powertop.service

sudo pacman -S gnome-power-manager

sudo pacman -Sy thermald
sudo systemctl enable thermald
sudo systemctl start thermald

sudo pacman -S cpupower
sudo systemctl enable cpupower
sudo systemctl start cpupower
and put the following
[Unit]
Description=Powertop tunings

[Service]
Type=oneshot
ExecStart=/usr/bin/powertop --auto-tune

[Install]
WantedBy=multi-user.target
into /etc/systemd/system/powertop.service, fixing the overheating problem.
Western Digital MyCloud
I also managed to scrounge up a 2TB Western Digital MyCloud (white tower-looking thing in the banner picture). This device is basically just a network storage unit for hosting “your own cloud”. I learned that it ran Linux and supported SSH connectivity out of the box, so I figured it would be a great device to host a network file system to share across the cluster. For now though, all I had to do was connect it to power and the ethernet switch, and then enable SSH access on the device. In my following blog post I will go into setting up the shared file system!
Conclusion
At this point, all of the computers were running Arch Linux, connected via ethernet, and running SSH. This was a good place to stop as the remaining steps were system configuration set up over SSH (of which there was a lot!).
The hardest part of these beginning steps was simply getting the old MacBooks to boot Arch. After this the real fun began: In my next blog post I will talk about setting up a shared file system, and making the nodes into a more cohesive unit. Then, in the post after that, I’ll go into using the cluster for some simple distributed computing tasks.
